서버에 postgresql 설치했으면, 외부 클라이언트에서 서버에 접속할 수 있도록 설정을 해주어야 한다.
서버가 Ubuntu일 경우와 Windows일 경우 설정하는 방법,
설정 후 DBeaver에서 접속하는 방법을 알아보도록 하자.
■ 서버가 Ubuntu일 경우
1. postgres에 접속한다.
pmk@pmk-virtual-machine:~$ sudo -i -u postgres
2. pg_hba.conf 파일 위치를 확인한다.
postgres@pmk-virtual-machine:~$ psql
postgres=# show data_directory; # 위치 출력 : /var/lib/postgresql/14/main
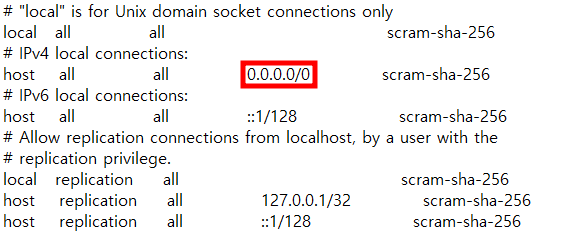
3. pg_hba.conf 파일 내용을 수정한다. (0.0.0.0/0으로 수정)
postgres@pmk-virtual-machine:~$ vi /etc/postgresql/14/main/pg_hba.conf

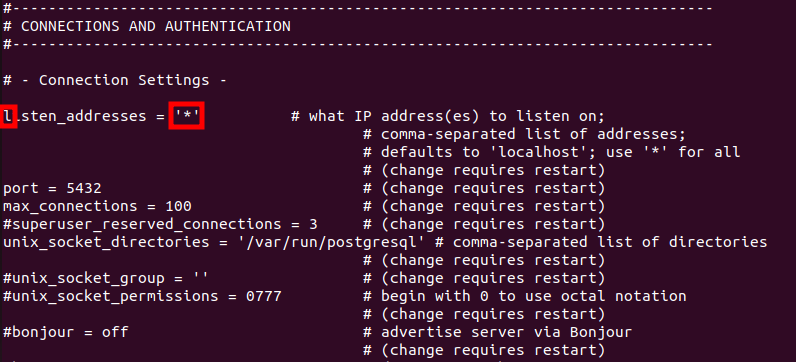
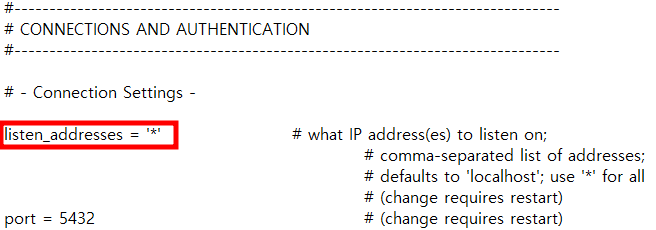
5. postgresql.conf 파일 내용을 수정한다.
- listen_addresses = '*'로 수정하고, 앞에 # 표시도 제거(주석 해제)
postgres@pmk-virtual-machine:~$ vi /etc/postgresql/14/main/postgresql.conf
6. 수정 후 postgres 계정에서 나온다.
postgres@pmk-virtual-machine:~$ exit # 실행하면 logout, There are stopped jobs. 표시
postgres@pmk-virtual-machine:~$ exit # 실행하면 logout, 마지막에 Vim: Finished. 표시
7. postgresql 서비스를 재실행한다.
pmk@pmk-virtual-machine:~$ sudo service postgresql restart
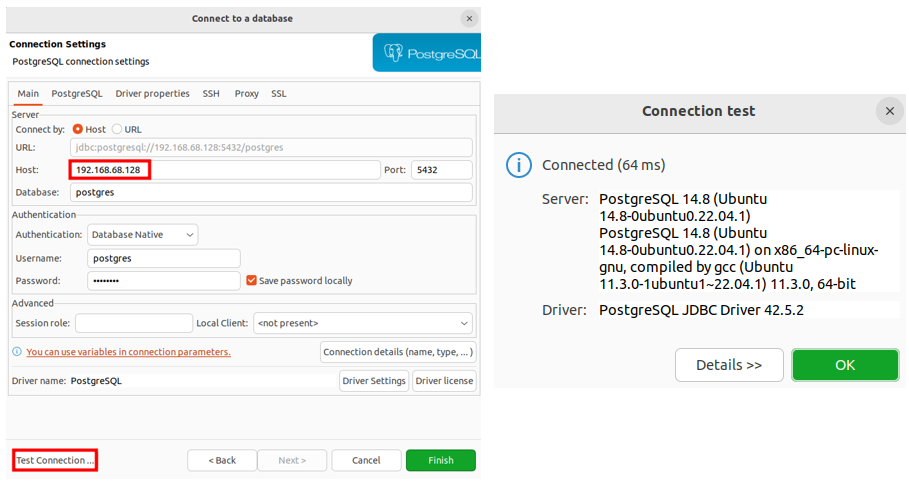
8. DBeaver를 실행하여 Host 부분을 서버 IP주소로 변경하고 Test Connection.. 클릭하면 Connected 메시지와 함께 팝업이 뜨면 접속 성공!
참고) postgres 비번을 모를 경우 설정방법
pmk@pmk-virtual-machine:~$ sudo -i -u postgres
postgres@pmk-virtual-machine:~$ psql
postgres=# alter user postgres with password 'postgres'; # alter user 사용자 with password '비밀번호'
■ 서버가 Windows일 경우
1. C:\Program Files\PostgreSQL\15\data 폴더 안에 pg_hba 파일을 수정한다. (경로는 다를 수 있음)
2. C:\Program Files\PostgreSQL\15\data 폴더 안에 postgresql 파일을 수정한다. (경로는 다를 수 있음)
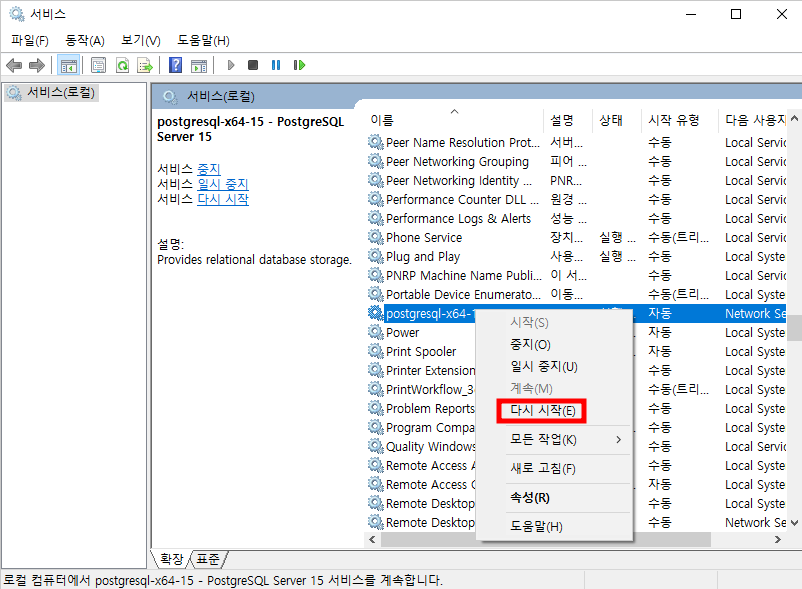
3. postgresql 서비스를 재실행한다.
4. DBeaver를 실행하여 앞서했던 방식과 동일하게 접속한다.
'Postgresql' 카테고리의 다른 글
| postgresql 설치 방법 - Windows (0) | 2023.07.01 |
|---|---|
| postgresql 삭제 방법 - Ubuntu22.04.2.LTS (0) | 2023.06.30 |
| postgresql 설치 방법 - Ubuntu22.04.2.LTS (0) | 2023.06.25 |